
Can a Temu-Built “Fake” GT2 RS Really Beat the Real Thing on Track?
The Ambitious Goal: Beating Porsche at Its Own Game
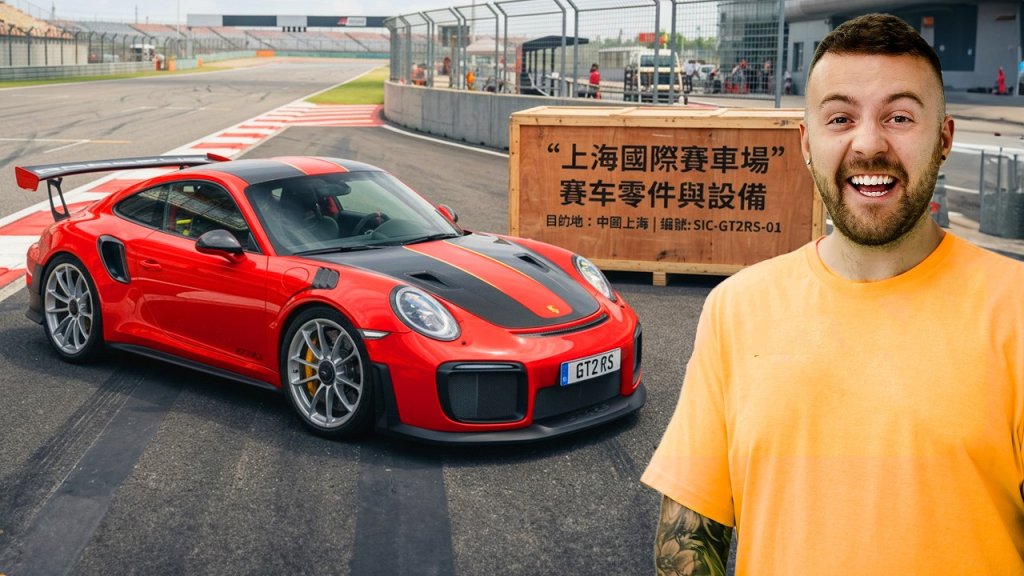
Chris Slix sets a clear objective for this build: turn a base Porsche 911 into a GT2 RS–style track weapon capable of beating a real GT2 RS, while spending less than a third of what the genuine car costs.
He frames the project as a challenge to modern performance-car pricing, arguing that manufacturers are “ripping us off” and that, with the right parts and know‑how, it should be possible to build something just as fast – or faster – for far less money.
The target is ambitious:
- The GT2 RS is one of the fastest Porsches ever made.
- It holds (or has held) lap records at multiple circuits, including the Nürburgring Nordschleife.
- Beating it requires more than power; it demands serious improvements in braking, grip, balance, and aero.
Chris has already added significant power in previous episodes. In this instalment, the focus shifts to reliability, road legality, handling, and dialing in the car so it can be driven to the circuit and pushed hard once there.
Protecting the Temu GT2 CS: Lights, Film, and Final Touches
Before tackling performance, the car needs to be legal and protected.
Road‑legal basics
The first obvious problem: missing lights. The front end has gaps where lighting units should be, so Chris and his team fit new components and confirm that the side lights and indicators work correctly. It’s one of the few “easy wins” in a build full of complications.
Paint protection and windscreen film
Chris then takes the Porsche to Ultimate Customs in Warrington. The car’s distinctive paint has already been laid down, so the priority is keeping it intact under hard use and on track.
Work done there includes:
- Hand‑cut paint protection film (PPF) over the custom bodywork.
- Remaining panels such as the front wing, passenger quarter and mirrors finished with film.
- A dedicated windscreen protection film – billed as optically clear and not cheap, but still far less expensive than repeatedly replacing a £780 glass screen.
Because the body kit is based on a GT2 RS replica rather than an actual Porsche shell, off‑the‑shelf PPF patterns don’t fit. The Ultimate Customs team has to hand‑trim pieces, making the job more involved than a typical Porsche installation.
Chris’s rationale is straightforward:
- He wants to be able to “beat on it round track” without worrying about stone chips.
- PPF is cheaper in the long run than regular repaints.
While at Ultimate Customs, they also add small personalised touches like bespoke GT2 CS badging and vinyl alignment on the rear, with Chris joking that he doesn’t normally work on customers’ cars himself.
Building the Handling Package: Suspension, Arms, and Nose Lift
With cosmetics and protection handled, the video moves into the core of what might let this car rival a real GT2 RS: the chassis.
Stripping down the factory setup
Back at the unit, Chris and his colleague Mickey begin by tearing down the stock suspension:
- Hubs removed front and rear.
- Standard steel brakes taken off.
- Factory dampers and springs removed.
- Several OEM suspension arms dropped to make way for upgraded parts.
Inside, the car already has red dials with a GT2 CS logo and a re‑programmed display that reads “911 Club Sport.” Vag Pro has previously helped with those details and with some wiring work.
Custom Bilstein coilovers and front‑end challenges
The centrepiece of the handling package is a custom Bilstein suspension setup developed specifically for this build.
Rear:
- Straightforward fitment of GT2 CS‑spec rear coilovers.
Front:
- Much more complicated because Chris wants:
- More camber via offset camber plates (Elephant Racing top mounts).
- A nose‑lift system (aftermarket air lift for the front axle).
- Custom coilovers.
The problem: none of these parts are designed to work together. Issues include:
- The nose‑lift bearing doesn’t fit over the Bilstein damper shaft.
- The spring cup won’t sit properly inside the aftermarket top mount.
- Stacking everything as‑is would leave a critical bearing barely supported, risking failure.
Bilstein steps in again, machining a custom adapter piece that:
- Mates the air‑lift components to the Elephant Racing camber plates.
- Keeps the bearing fully supported.
- Allows the assembly to rotate and articulate correctly.
The only trade‑off is a higher minimum ride height. Chris is fine with this because the car’s splitter already sits low, and his goal is handling rather than an extremely low stance.
Arms, bushes, and a trip to the machine shop
Next, they tackle the arms and bushings.
Upgrades include:
- Adjustable caster arms on the front for greater geometry control.
- Aluminium coffin‑arm bushes from Suspension Secrets.
- Rear camber arms that use shims to set camber precisely.
However, more compatibility issues arise:
- The new adjustable caster arms are designed to work with a specific, flatter bush.
- Chris’s full‑aluminium bushes are physically larger than the intended part.
Solution:
- They visit a local machine shop.
- The machinist confirms the part is solid aluminium and safe to turn down.
- Around 17 mm total is removed (about 8.5 mm per side) to match the needed dimensions.
- The end result: the aftermarket arms and machined bushes now fit together properly.
Chris plugs the machine shop’s YouTube channel, noting that they do similar precision fixes regularly.
Once reassembled:
- The front end now has adjustable caster, camber, stiffer bushes, and centre‑lock hubs.
- Chris emphasises that everything serviceable has been upgraded in search of sharper track performance.
Nose Lift on a Right‑Hand‑Drive Car: Wiring, Brackets, and Workarounds
The nose‑lift kit, designed for a left‑hand‑drive car, presents another set of obstacles when adapted to Chris’s right‑hand‑drive 911.
Packaging the compressor and control module
The instructions assume component locations that don’t exist on a right‑hand‑drive shell. Factory items occupy the suggested mounting points.
Chris and Mickey improvise:
- They remove the factory tyre inflator pump.
- In its place, they install the nose‑lift compressor and control module.
- A bracket from a McLaren convertible roof is repurposed as a mounting bracket, with a rivnut added and the piece painted for a cleaner look.
- Foam padding is added above the fuel tank area to insulate and secure the compressor.
Routing the air lines involves:
- Connecting the compressor to a small “system unit” and then to each front strut.
- Using a T‑piece to split the output where necessary.
- Keeping hoses tidy despite the non‑standard layout.
Once the plastic trim is re‑installed, the solution looks close to OEM from above, even if it is entirely custom underneath.
Sorting the wiring without reliable instructions
The nose‑lift wiring is just as awkward:
- The instructions don’t match the supplied harnesses.
- Wire colours differ from what the manual describes.
- There is an extra CAN interface box that may be redundant.
Mickey deduces that:
- The blue wire is the power feed.
- The black wire is earth.
- Two CAN wires provide the data link.
- The under‑bonnet module appears to replace the CAN box described in the instructions, meaning that extra box can be ignored.
After trial and error, they finally get the system to power up and lift the nose on command. With that working, they reassemble the front compartments and plastics.
Braking and Wheels: Where Plans Meet Reality
The braking system was meant to be as extreme as the suspension, but this is where Chris has to compromise temporarily.
Attempting a full carbon‑ceramic conversion
The plan:
- Fit genuine Porsche carbon‑ceramic discs (front and rear) taken from a GT2 RS.
- Install matching front and rear calipers.
- Use corresponding pads and brake‑wear sensors.
- Upgrade to Manthey Racing braided brake lines (purchased via Design 911).
In theory, this would replicate the GT2 RS’s carbon‑ceramic setup.
In practice:
- The front calipers are physically much larger than the stock units.
- The mounting bolt holes don’t line up with the hubs.
- An additional adapter bracket, not supplied with the used kit, would be required.
On the rear:
- The calipers turn out to be the wrong variant for Chris’s 911.
- The mounting ears are the wrong length; photos of correct GT2 RS rears confirm the mismatch.
Chris says the seller is honest and will take the parts back, but for now:
- The stock steel discs and red factory calipers are refitted.
- Manthey braided lines are still used, improving pedal feel and consistency.
He notes Porsche’s colour coding for calipers:
- Red: steel “sports” brakes.
- Acid green: hybrid or electric models.
- White: special silicon‑carbide type system.
- Yellow: carbon‑ceramic brakes.
Chris leaves it to viewers to debate in the comments whether he should stick with red or convert to yellow once a correct carbon‑ceramic kit is sourced.
Mirror glass and other details
Even simple items fight back:
- Replacement mirror glass comes with multiple connector options.
- After guessing the correct single white plug plus heater terminals, the glass snaps into place without issue.
Chris jokes they should wait until tomorrow to test it, fearing that, given the day’s luck, it might fail immediately if checked.
Centre‑lock wheels from Wheelmania
Because the hubs are now centre‑lock, the OEM multi‑bolt wheels are no longer usable.
Chris turns to Wheelmania, who supply:
- Bowler FP2R fully forged wheels.
- A design reminiscent of modern GT3 RS wheels, but with weight‑saving cut‑outs in the spokes.
- A bright silver finish chosen to look timeless and “factory Porsche” rather than aggressive aftermarket.
The wheels bolt up cleanly, and with the car back on the ground and the nose‑lift adjusted, the stance is purposeful without being excessively low.
Wheelmania’s involvement covers:
- Sourcing and supplying the wheels.
- Offering wheel refurbs, tyres, and related services via their Wheelmania UK operation.
Electronics and Alignment: Making the Package Work
Beyond the hardware, two final steps are key to making the car usable and competitive: diagnostics and geometry.
OBD11 diagnostics and coding
As a sponsor of the video, OBD11 is used to:
- Scan a BMW 3 Series for stored faults (25 codes across engine, DSC, boot, etc.) and clear them.
- Demonstrate one‑click coding features such as disabling auto start‑stop and enabling “party mode” lights.
Chris notes:
- OBD11 supports full diagnostic depth on VW Group, BMW/Mini, Toyota/Lexus and now Ford in the USA.
- It offers basic OBD2 diagnostics on most other cars.
- His discount code "slicks" gives up to 20% off certain OBD11 packages (excluding the device alone), via a link in the description.
Although the demonstration is on a BMW, the point is that tools like this help keep complex builds fault‑free and configurable.
Alignment at Alan Motorsport, Donington Park
With all the new hardware installed, the car’s geometry is badly out of spec. Chris takes it to Alan Motorsport at Donington Park, where Rob handles a full track‑focused alignment.
Initial readings show:
- Rear camber at around –4.75° to –5° on one side – far too aggressive for their aims.
- Front caster imbalance side to side.
- Toe wildly off, so the wheels are effectively pointing in different directions.
Rob’s approach:
Rear:
- Dial rear camber back to around –3° per side using the shimmed arms.
- Set a small amount of toe‑in:
- About 14 minutes of toe per side (around 1.7 mm per side).
- Intended to keep the car stable and recoverable when it starts to slide.
- Helps to warm the tyres and avoid a nervous rear end.
Front:
- Increase caster within the limits of the new arms and tyre clearance.
- Aim for roughly 3° of negative camber at the front.
Rob notes:
- The setup is constrained because the base car is not a GT model, so it lacks certain factory shim‑adjustment options in the front arms.
- More camber would be ideal for outright front grip, but they are close to physical limits with the current hardware.
- The four‑wheel‑drive system will help mask some of the limitations versus a factory GT2 RS.
Even so, he expects:
- High cornering and exit grip.
- A lively but controllable balance (“four‑wheel drifting a lot” if pushed).
- Strong braking stability, given that camber hasn’t been pushed to an extreme that would seriously reduce braking contact patches.
Chris emphasises that this isn’t a basic tyre‑shop tracking job; the car’s behaviour now reflects considered decisions about camber, caster, toe and how they work with a powerful AWD chassis.
Summary: How Close Is the Temu GT2 CS to a Real GT2 RS?
By the end of the video, Chris Slix’s GT2 CS – a GT2 RS‑style build heavily reliant on aftermarket parts, including components sourced via Temu in earlier episodes – has moved from a wild idea towards a fully‑engineered track car.
Key points of progress tied to this instalment:
-
Road legality and protection
- Functional lighting and number plates fitted.
- Extensive paint protection film and windscreen film installed to withstand track abuse.
-
Chassis and suspension
- Custom Bilstein coilovers front and rear.
- Nose‑lift system integrated despite left‑hand‑drive‑based instructions.
- Elephant Racing camber plates and custom Bilstein‑machined adapters.
- Upgraded arms, aluminium bushes and shimmed rear camber adjustment.
-
Brakes and wheels
- Full carbon‑ceramic conversion postponed due to fitment errors with used GT2 RS calipers.
- Stock steel brakes retained for now, with Manthey braided lines for improved feel.
- Bowler FP2R forged centre‑lock wheels from Wheelmania fitted in a factory‑style silver.
-
Setup and electronics
- OBD11 used as a diagnostic and coding example.
- Professional track alignment at Alan Motorsport, optimising camber, toe and caster within hardware limits.
Chris stops short of claiming victory over a real GT2 RS; the actual track comparison is left for a future episode. What this video shows is the depth of work required just to get into the conversation with a factory GT car: custom machining, problem‑solving around mismatched aftermarket components, and specialist alignment to extract the potential.
The build now has the power, a heavily reworked chassis, and aero to match its intent. Whether a Temu‑aided GT2 CS can truly beat a genuine GT2 RS on track remains to be seen, but by the end of this chapter, Chris Slix has turned a bold claim into a credible contest rather than just a visual replica.
Comments
No comments yet. Be the first to join the discussion.